Showing posts with label vanilla. Show all posts

Thursday, June 07, 2007

Heart shortbread kisses


Well it looks like I have had disaster number 3 thanks to disaster number 2. I decided to make some shortbreads from Bill Granger’s Bill’s Food to take over to Megan’s for a sweet after lunch treat. The recipe stated minimal beating so I thought I could get away with doing it by hand while in the absence of a mix master. Not so, I don’t think the butter really mixed in properly & as a result the biscuits spread & melted into each other while cooking & some were so bad that they bubbled up & just crumbled when touched. So I ended up with about 8 biscuits (minus one perfect one I dropped on the floor) instead of the 15 the recipe states you will make. One thing though, disaster or no they still tasted amazing, that melt in the mouth buttery sweetness was fantastic sandwiched together with the sweet jam. Hopefully that’s it for kitchen disasters for while now, fingers crossed.

Heart shortbread kisses

40g (1/3 cup) icing sugar, sifted
250g unsalted butter, softened
1 teaspoon vanilla extract
60g (1/2 cup) cornflour
185g (1 ½ cups) plain flour
a pinch of salt
80g (1/4 cup) raspberry jam
icing sugar for dusting

Beat the sugar & butter together in a bowl until just combined. Add the vanilla extract, sifted flours & salt & mix until a dough forms. Mould into a log 6cm in diameter, wrap in plastic wrap & refrigerate for 30 minutes.

Preheat the oven to 180c. Remove the dough from the fridge & cut into 7mm slices, then cut shapes with a 5cm heart biscuit cutter. Reroll the excess dough & repeat the process until all the dough is used up.

Place the hearts on a greased & lined baking tray & bake for 15 to 20 minutes, until golden brown. Transfer to wire racks & leave to cool completely. Spread half the biscuits with jam, top with remaining biscuits & sprinkle with icing sugar.

Monday, June 04, 2007

Choc Oatmeal Cookies


On the weekend I made yet another batch of cookies & this time disaster struck again, my mix master blew up whilst creaming the butter & sugar, it is just a cheap Ronson that I have had for about 8 years (of which it probably has only been used a lot these last 2 years) & now the question is, what should I replace it with? I would love a Red Kitchen aid but will have to think long & hard before blowing that much cash on a kitchen appliance even though it will definitely be used! Now I’m just waiting for disaster no 3, you know what they say, things come in threes and I don’t suppose last weeks disaster where our drain water started dripping through the light fitting in the ceiling down into my kitchen due to a blocked toilet counts as that I am classifying as a plumbing disaster. Anyway the biscuits were from Bill Granger’s Bills Food & were nice & crunchy, they almost tasted like a butternut snap with choc chips to me which is good as I love butternut snaps. And thankfully they still turned out seeing as how I had to half beat them by hand – those arm muscles from carrying Chloe around are coming in handy lately.

Choc Oatmeal Cookies

150g unsalted butter, softened
230g (1 cup) soft brown sugar
1 egg, lightly beaten
2 teaspoons vanilla extract
125g (1 cup) plain flour
1 teaspoon baking powder
a pinch of salt
235g (2 1/3 cups) rolled oats
175g (1 cup) chocolate chips

Preheat oven to 180c. Line three large baking trays with baking paper.

Cream the butter & sugar together in a bowl until fluffy & smooth. Add the eggs & vanilla extract & beat until smooth. Sift the flour, baking powder & salt into the bowl & mix lightly. Add the oats & choc chips & stir to combine.

Roll tablespoons of mixture into balls and place on the baking trays. Flatten the balls with a fork dipped in flour. Bake the cookies for 20 minutes, or until pale golden. Remove from the oven & cool on the trays for 5 minutes before transferring to a wire rack to cool. Makes about 30.

Thursday, May 31, 2007

Iced Spice Fingers


Today Rach was coming over for a nice early (11am) visit with Ethan so I thought I would whip up a batch up bickies for morning tea, biscuits are my craze at the moment & there will be a few more coming up soon. I don’t think starting at 7.30am on baking is a good idea as I must have been half asleep, they were nearly a disaster but somehow managed to turn out very nice indeed in the end by some miracle. Do you like the nice fluorescent shade of pink I managed to attain? Firstly after stage one I ran upstairs to do my morning exercise, bike & some sit ups (still trying to regain pre pregnancy bod) & 5 minutes in remembered that I forgot to add the egg & vanilla so ran down, took the mix out of the fridge & added them in completely the wrong order, it was so tough to stir these in that I actually broke my wooden spoon in half. After my exercise session I then realized that I forgot to preheat my oven but went ahead without waiting as I only had so much of a window while the little Miss was asleep. Next I made the icing with 2 tablespoons instead of teaspoons of flour & was worried that this would lend a floury flavour but no taste of flour at all. I guess the lesson is that even when it looks like you might have to bin the mix all can still turn out & exact measurements or following of the recipe is not really necessary even in the more unforgiving world of baking where I thought that precision was always the key!

Iced Spice Fingers

180g butter
100g brown sugar
265g (3/4 cup) golden syrup
1 egg
1 teaspoon vanilla extract
450g plain flour
75g self raising flour
½ teaspoon bicarb of soda
3 teaspoon ground ginger
1 teaspoon each of ground cinnamon & mixed spice
½ teaspoon ground cloves

Icing
240g (1 ½ cups) icing sugar
2 teaspoon plain flour
1 egg white
1 tablespoon lemon juice

Preheat oven to 170c. Combine butter, sugar & golden syrup in a saucepan and stir over low heat until sugar is dissolved and butter melted. Cool for 10 minutes, then stir through egg & vanilla.

Sift dry ingredients into a large bowl, pour over golden syrup mixture & stir to combine. Turn mixture out onto a lightly floured work surface & knead until combined. Wrap in plastic wrap & refrigerate for 30 minutes.

Using your hands, roll tablespoons of the mixture into 6cm lengths. Place onto baking paper lined oven trays & press lightly to flatten. Bake for 12 minutes or until browned. Cool on a wire rack.

For the icing, sift together sugar & flour. In a bowl lightly whisk egg white until foamy, gradually stir in icing sugar mixture, then add lemon juice & mix to combine. Halve icing, add a few drops of pink colouring to half & stir to combine. Spread icing over biscuits and stand until set.

Friday, May 25, 2007

Chocolate & Coconut Budino


This recipe was by Tobie Puttock from a recent Delicious magazine. A Budino is an Italian version of a self-saucing pudding. One tip that you probably don’t need, never attempt to make a self saucing pudding in a spring form tin, when you pour over the boiling water, it will leak straight out the bottom & you will have a big mess! Despite this minor disaster I managed to save the pudding by pouring extra water on top, banging it in the oven on a tray & crossing my fingers hoping for the best. The result was pretty darn good, I loved the addition of coconut for a bit of a change to your plain old chocolate pudding. I served it with some home made vanilla bean ice cream, yum.

Chocolate & Coconut Budino

1 cup (150g) plain flour
2 teaspoons baking powder
2 tablespoons cocoa powder plus 2 tablespoons extra for topping
¼ cup (20g) desiccated coconut
¼ cup (55g) caster sugar
40g unsalted butter, melted
½ cup (125ml) milk
1 egg
1 vanilla bean, split, seeds scraped
1 firmly packed cup (200g) brown sugar
halved strawberries & crème fraiche or ice cream or whatever takes your fancy to serve

Preheat oven to 175c & grease a 24cm non-stick metal pie or ceramic dish. Sift the flour, baking powder, cocoa & a pinch of salt into a large bowl, then stir in the coconut and caster sugar. In a separate bowl, combine the melted butter, milk, egg and vanilla seeds with a wooden spoon, then mix with the dry ingredients. Pour the mixture into the dish & set aside for a minute. Combine the extra cocoa powder & brown sugar in a bowl. Sprinkle the mixture over the pudding, then carefully pour 1 cup boiling water over the top. Bake in the oven until the centre has puffed & the pudding feels firm – this should take about 30 minutes (If you’re using a ceramic dish it will take about 40-45 minutes).

Serve immediately with strawberries & ice-cream or whatever takes your fancy! Serves 4-6

Tuesday, May 22, 2007

Banana, Cherry and White Chocolate Cupcakes


Here is another delicious concoction from Nigella Lawson’s How to be a domestic Goddess’. They are called cupcakes yet I think they are more of a muffin, in my thinking a muffin is a heavier stir everything together job whereas cupcakes are more like mini cakes, light , airy & made with lots of creaming of butter & sugar & so forth. Here is another opinion on the matter which seems to be in line with my thinking, what is your definition?

Banana, Cherry and White Chocolate Cupcakes

125g unsalted butter
200g caster sugar
1 teaspoon vanilla extract
3 ripe bananas
60ml (4 tablespoons) sour cream
2 large eggs
1 teaspoon bicarb of soda
½ teaspoon baking powder
300g plain flour
40g dried cherries, chopped
50g white chocolate, chopped or buttons
12 bun muffin tin with paper cases

Preheat the oven to 180c. Melt the butter in a saucepan, then, off the heat, add the sugar, vanilla and soft bananas, mashing them with a fork in the pan. Stir in the sour cream & the eggs and – still using your fork or a wooden spoon if you prefer – beat to mix. Add the bicarb & the baking powder, & stir in as well, then finally stir in the flour, cherries and chocolate. When the mixtures just blended, divide between the 12 muffin cases & cook for 20 minutes or until golden & springy on top. Remove the cupcakes in their papers to a wire rack & leave till cool. Makes 12.

Saturday, May 19, 2007

Hot Strawberry Soufflés


Just look at these amazing, puffed up ramekins full of light and airy, fruity goodness. This is the first time I have made or eaten a soufflé other than the chocolate variety so I didn’t know what to expect, the recipe is from an old issue of Australian Table Magazine & was this weeks ‘low fat’ dessert offering for my parents. I served it with some amazing home made vanilla bean ice-cream which I whipped up in my fabulous new ice-cream machine that they bought me for my birthday (stay tuned for ice-cream recipes coming up!). I was quite surprised at how airy & light the end result was, in my experience chocolate soufflés seem much heavier & cakier even though they are still light, in fact it’s been a while since I’ve had one so I better make some again soon & compare the difference. The strawberry ones were nice for a change & good to know they are low fat however my pick would always be the heavenly gooey choc variety.

Hot Strawberry Soufflés

150g frozen strawberries, thawed
1/3 cup (75g) sugar
2 teaspoons kirsch, orange flavoured liqueur or brandy
juice of half an orange
4 egg whites
icing sugar, for dusting

Preheat oven to 220c. Grease 4 x ¾ cup ovenproof soufflé dishes. Place strawberries in a bowl with sugar, liqueur and orange juice. Crush lightly with a fork. Set aside.

Whisk egg whites until form but not dry. Stir a spoonful into strawberry mixture. Fold in remaining egg whites. Spoon into prepared dishes & level tops with a metal spatula.

Place in oven & immediately reduce oven temp to 190c. Bake for 10 minutes, until well risen. Dust with sifted icing sugar & place on heated plates. Serve with cream or ice cream.

Monday, May 14, 2007

Caramelised Pecan Tart


For Mothers day I made a couple of cakes to take along for the family lunch. One was a black forest cake which tasted great but was a bit of a disaster in that the top sort of fell apart so I wont be giving that recipe. The second offering was this pecan pie at my mum’s request. She had recently tried making one which didn’t quite work out so this was another recipe, this one from a recent Delicious Magazine, the original recipe also came with bourbon ice cream which I have skipped. Also I used normal everyday supermarket caster sugar as I have no idea what ‘golden’ caster sugar is. It was really very yummy & my mother has also approved, sorry about the crap photo taken very hurriedly on the paper plate before scoffing!

Caramelised Pecan Tart

225g plain flour, sifted
150g chilled unsalted butter, cubed, plus 120g for the filling
300g pecan halves, broken into pieces
150g runny honey
100ml thickened cream
2 tablespoons (40ml) bourbon or whiskey
5 egg yolks
150g golden caster sugar
1 teaspoon vanilla extract
1 teaspoon grated fresh nutmeg

For pastry, combine flour with a pinch of salt. Use your fingertips to rub in cubed butter until mixture resembles fine breadcrumbs (or whiz in a food processor). Add 2 tablespoon of iced water & stir with a knife (or whiz again) until pastry forms a ball. Knead briefly on a lightly floured surface until smooth, then roll out & use to line a 24cm loose bottomed tart pan. Prick base with a fork & chill for 20 minutes.

Preheat oven to 200c. Line pastry with baking paper & fill with pastry weights or uncooked rice. Bake for 15 minutes, then remove paper & weights. Bake for a further 5 minutes or until pastry is a pale biscuit color.

Remove pastry case from oven & reduce oven temp to 190c. Spread nuts on a tray & toast for 5-6 minutes. Meanwhile warm honey, butter, cream & bourbon over low heat until butter melts. Beat yolks in a bowl, then stir in honey mixture, nuts, sugar, vanilla, nutmeg & a pinch of salt. Pour filling into pastry & bake for 40 minutes. Serve warm or cold.


Monday, May 07, 2007

Happy Birthday to Me!


Happy Birthday to me! To celebrate I had my friends over for an afternoon bbq, the sun was out, the rain stayed away (Not that we want the rain to stay away forever but it was nice just for the day!) & it was a beautiful afternoon. To fulfill everyone’s sweet tooth’s I made up this batch of brownies from Nigella Lawson’s How to be a Domestic Goddess. They were very nice though my favourites are still the cherry brownies from Jamie Oliver’s latest book. Also they weren’t quite cooked after the specified 25 minutes & even after leaving them for a few extra minutes I think I still took them out too early as the recipe put the fear of God into me that they would turn out crumbly & horrible if left too long. This was definitely not a problem with the center being almost gooey rather than chewy although they did hold their form so maybe this was how they were supposed to turn out, who knows, I have just discovered brownie cooking & am no expert as yet, will have to keep experimenting.

Brownies

375g soft unsalted butter
375g dark chocolate
6 large eggs
1 tablespoon vanilla extract
500g caster sugar
225g plain flour
1 teaspoon salt
300g chopped walnuts

Preheat oven to 180. Line a 33 x 23 x 5.5cm tin with baking paper. Melt the butter and chocolate together in a large heavy based pan. In a bowl or jug, beat the eggs with the sugar & vanilla. Measure the flour into another bowl & add the salt.

When the chocolate mixture has melted, let it cool a bit before beating in the eggs & sugar, and then the nuts & flour. Neat to combine smoothly then scrape out of the pan & into the lined tin.

Bake for about 25 minutes. When it’s ready, the top should be dried to a paler brown speckle, but the middle still dark & dense & gooey. And even with such a big batch you do need to keep alert, keep checking: the difference between gungy brownies & dry brownies is only a few minutes, remember they will continue to cook as they cool. Makes a maximum of 48.

Sunday, April 22, 2007

Pears baked in red wine and vanilla


After my wonderfully light & healthy tuna salad for dinner the other night I was left wanting more, can you blame me? So to not entirely spoil my good intentions I steered away from cakes or anything stodgy & instead tried out a new recipe for baked pears. These were sensational, the best I have ever made & maybe even eaten! The red wine sauce goes all sticky, sweet & syrupy which is perfect with the soft juicy pears & tiny dollop of cream on the side. The recipe also comes from Ben O’Donoghue and Curtis Stones’s Surfing the Menu.

Pears baked in red wine and vanilla

4 ripe pears
55g unsalted butter
100g caster sugar
2 vanilla pods, split in half lengthways
grated zest of ¼ orange
500ml red wine (Cabernet)
4 tablespoons crème fraiche, cream or ice cream to serve

Preheat oven to 150c.

Wash & dry the pears, then cut a small slice from the bottom so each can stand upright. Smear the butter all over them & sprinkle with 2 tablespoons of the sugar.

Mix the remaining sugar with enough eater (1-1/2 tablespoons) to make a paste. Place in a heavy based flameproof pot large enough to hold the pears upright. Heat until the sugar paste turns a light golden color. Add the vanilla pods, zest & half the red wine. Place the pears upright in the pot & transfer to the oven.

Bake, spooning the red wine sauce over the pears at frequent intervals until the pear is soft and the syrup is reduced, about 45 minutes. Add more wine if the liquid reduces too much.

The pear is cooked when the flesh is soft & the outside slightly wrinkled. Remove from the oven & cool in the pot to room temperature. Serve drizzled with syrup & a dollop of crème fraiche, cream or ice cream.

Friday, April 13, 2007

Alcoholic Hot Chocolate


Last night I had a chocolate craving but a) there was no ‘eating’ chocolate in the house & b) I didn’t feel like going all out & whipping up a cake or anything that elaborate. It was then that I remembered seeing a very wicked looking recipe for Hot Chocolate in Nigella Lawson’s Feast so I made a batch right away. I’m not much of a hot chocolate drinker, preferring tea or coffee when I want a hot drink, but this was so rich & full of good flavours & not too sickly sweet it was irresistible. The recipe makes two & I urge you try it, you wont regret it. Also I would be tempted to try it out with all sorts of different alcohol, Kahlua will be next I think.

Alcoholic Hot Chocolate

500ml milk
100g dark chocolate
1 cinnamon stick
2 teaspoons honey
1 teaspoon brown sugar
1 teaspoon real vanilla extract
2 tablespoons dark rum or to taste

Put the milk into a saucepan. Break the chocolate into pieces & add to the milk along with the cinnamon, honey & sugar. Heat gently until the chocolates melted. Add the vanilla & mix with a small hand whisk and, still whisking, add a spoonful of rum first & taste to see if you want more & add more sugar if you want this sweeter, too. Take out the cinnamon stick & pour into two cappuccino cups or caffe latte mugs. Heaven!

Friday, March 23, 2007

Upside-Down Cake with Apple & Cinnamon


Finally I have used the last of the Granny Smiths so all of my leftover apple recipes (of which I still have quite a few), can for the most part be put away until next years crop. The lucky recipe to score the last lot was this luscious & wicked (see butter & sugar content) cake from one of my favourite sweets men, Bill Granger of course, from Bills Sydney Food. It was delicious as usual, a few steps to get through so not quite as simple as some but well worth the effort. Looking fwd to making something wicked with chocolate next week now that the apples are gone….

Upside-Down Cake with Apple & Cinnamon

Topping
100g unsalted butter
100g large firm apples, peeled, cored & cut into 1cm slices
juice & zest of 1 lemon
1 cup caster sugar
1 teaspoon vanilla essence

Cake
100g unsalted butter, softened
1 cup caster sugar
4 eggs, separated
1 teaspoon vanilla essence
1 ¼ cups plain flour
2 teaspoons baking powder
a pinch of salt
1 teaspoon ground cinnamon
pouring cream, to serve

To make the topping, place the butter in a non stick frying pan over medium heat & melt. Toss apples with lemon zest & juice in a bowl & add to butter. Cook apples gently for 3 minutes, stirring occasionally. Add the sugar & vanilla & cook for 5 minutes longer.

Remove apples from the pan with a slotted spoon and arrange in the bottom of a greased & greaseproof paper lined 23cm spring form cake tin.

Increase heat & boil remaining liquid in the pan for 5 more minutes until a rich caramel forms. Pour caramel over apples in base of tin.

To make the cake, preheat oven to 180c. Place butter & sugar in a bowl & cream until light & fluffy. Add egg yolks one at a time, beating after each addition. Add vanilla. Gently fold in the sifted flour, baking powder, salt & cinnamon.

In a small clean bowl, beat egg whites until stiff. Fold through cake mixture with a large metal spoon. Spoon evenly over apples & caramel & smooth out with a spatula. Bake for 40 minutes or until a skewer comes out clean. Remove cake from oven & leave in the tin for 5 minutes. Remove sides from the tin & place a large serving plate on top of cake. Turn cake over onto serving plate, remove base & greaseproof paper. Serve warm with cream.

Monday, March 12, 2007

Chocolate Truffle Tarts


After all the apple cooking I have done of late, I finally got sick of cooking with the one fruit & decided I needed an intense chocolate fix. Megan was coming over for lunch so I hit her with these Chocolate Truffle tarts. As the name suggests it is pretty much a truffle though in tart form & with the added bonus of an oreo base & lots of luscious raspberries hidden in the tart & the cream it is served with. Very rich & delicious though you would struggle to eat more than one without feeling sick! A quick note, the recipe was to serve four yet I made eight & still had some chocolate mix leftover which with extreme willpower I threw out instead of just eating up. The recipe comes from a recent Delicious magazine.

Chocolate Truffle Tarts

150g chocolate cream biscuits (Oreo’s are what I used)
120g unsalted butter, melted
300ml thickened cream
1 teaspoon vanilla extract
250g good quality dark chocolate, roughly chopped
300g raspberries
1 tablespoon icing sugar
½ cup cocoa powder, to dust

Lightly grease the base & sides of eight 8cm x 2cm loose bottomed tart pans. Process biscuits in a food processor until fine crumbs form. Add melted butter & process until well combined. Press biscuit mix firmly over bases of tart pans to cover. Chill while you make the filling.

Heat 200ml cream in a pan with the vanilla over low heat & bring to just below boiling point. Remove from heat, add chocolate & stir until melted. Transfer to a bowl & cool completely.

Using a fork, crush half the berries in a bowl. Spread over biscuit bases, then cover with chocolate mixture. Cover and freeze for 2-3 hours until firm. (Remove from freezer 30 minutes before serving.)

Combine icing sugar & remaining berries in a bowl. Crush with fork until sugar dissolves. Press mixture through a fine sieve into a bowl & discard seeds (I omitted this step being quite happy to have my berries seeds & all). Whip remaining 100ml cream & swirl through berry puree. Dust tarts with cocoa & top with berry cream

Saturday, February 10, 2007

White Chocolate & Pistachio Biscuits


Taking a break from apples I made these scrumptious biscuits for the girls to snack on after brunch with a coffee. The recipe comes from Nigella Lawson’s How to be a Domestic Goddess. It is surprisingly quick to make, the only time consuming part the shelling of the pistachios – though you can buy them pre-shelled to save time if you want. The end result is a slightly chewy biscuit made quite rich & tasty thanks to the brown sugar, with chunks of white chocolate & pistachios that are incredible. Anyway as you can tell I love them, hope the girls do too. I made exactly 36 as the recipe suggested with 12 to a tray, think this should be cut down to 9 a tray & done in four batches as they did melt into each other with this many per tray.

White Chocolate & Pistachio Biscuits

100g soft unsalted butter
125g caster sugar
100g soft brown sugar
1 teaspoon vanilla extract
1 large egg
150g plain flour
1 teaspoon bicarbonate of soda
100g ground pistachios
125g whole pistachios
125g white chocolate, chopped
2 baking sheets, lined

Preheat oven to 180c.

Cream together the butter & sugars until soft & almost moussy. Add the vanilla & the egg, then the flour and bicarb. Don’t worry if the mixture looks almost curdled after you’ve beaten in the egg. When you’ve got a smooth, thick dough, add the nuts & chocolate and mix to combine.

Pinch of pieces of dough & roll them into walnut sized balls in your hands. Place these, generously spaced, onto the baking sheets, and put in the oven for 10-12 minutes, by which time the biscuits should be a pale gold around the edges.

Leave to set for a couple of minutes on the baking sheets before transferring to a wire rack to cool.

Makes about 36

Sunday, February 04, 2007

Sour Cream Chocolate Cake with Sour Cream icing


A very simple & yum Chocolate cake from Nigella Lawson’s How to be a Domestic Goddess, good for those that don’t like anything fancy about their cake. I'm trying to make & consume as much chcolate as I can before the very soon to be birth of junior Miss Vicious as I have heard some terrible tales about having to completely cut out chocolate from your diet when feeding as my good friend Rachel has had to do, that would be an absolute disaster! So this cake was very easy to make, & the icing in particular is spectacular, the sour cream really did lend it a lovely subtle tang, though as with most of her recipes I found there was way too much icing so a hell of a lot was consumed straight out of the bowl – Fantastic! Also I don’t know if ‘golden’ icing sugar is anything special – I just used the regular kind?

Sour Cream Chocolate Cake with Sour Cream icing

Cake
200g Plain Flour
200g Caster Sugar
¾ teaspoon baking powder
¼ teaspoon bicarb of soda
½ teaspoon salt
200g soft unsalted butter
40g best cocoa
150ml sour cream
2 large eggs
1 ½ teaspoons vanilla extract
2 x 20cm sandwich tins, buttered & lined

Icing
80g milk chocolate
80 dark chocolate
75g unsalted butter
125ml sour cream
1 teaspoon vanilla extract
1 tablespoon golden syrup
300g golden icing sugar, sieved (plus more if needed)
½ teaspoon hot water

Preheat the oven to 180c/gas mark 4.

Combine the flour, sugar, baking powder, bicarb and salt in a large bowl. Then, using an electric mixer, add the butter. In a wide-mouthed measuring jug, whisk together the cocoa, sour cream, eggs and vanilla, then slowly add this cocoa mixture to the ingredients in the bowl, beating until thoroughly mixed.

Pour the batter into the prepared tins and bake for 30 minutes; when they’re ready the cakes should be starting to shrink back from the edges of the tins. Leave for 10 minutes in their tins on racks, then turn out to cool.

To make the icing, melt the chocolate and butter in a microwave, or in a bowl over hot water. Let cool a little, then stir in the sour cream, vanilla and syrup. Add the sieved icing sugar and a little hot water, blending until smooth. When you’ve got the texture right – thick enough to cover but supple enough to spread, adding more icing sugar or water as required – you can ice the cakes.

Cut four strips of baking parchment and make an outline of a square with them on a flat plate. Sit one cake on top of the paper pieces, spread with icing, sit the second cake on top and use the rest of the icing to cover the top and sides. Leave spatula-smooth or swirl with a knife as you wish.

Serves 6-8.

Sunday, January 14, 2007

Summer Fruitcake with lemon mascarpone cream


As well as pasta, I have been quite fond of cakes these past few months & I think if I wasn’t working I would be hard pressed not to make one very single day, now that would be a very bad thing. Luckily I am still slaving away so usually only manage to sneak one in a week. This week I had some friends coming over for lunch & had this recipe from Delicious magazine that takes advantage of the abundance of summer fruit in our shops now so I was dying to try it out. As well as berries it also used peaches, the sweetness & slight tartness of each working beautifully together. Also the almonds gave this cake so much more, I was lucky any even got baked the mixture was so irresistible. I found I had to cook it about 10 minutes or so longer than required & the end result was still a lovely moist cake full of fruity goodness and don’t skip the lemon cream, its goes really well too.

Summer Fruitcake with lemon mascarpone cream

250g unsalted butter, softened
250g caster sugar
6 eggs
½ cup (120g sour cream)
200g raw almonds
180g plain flour, sifted
1 ½ tsp baking powder
1 tsp vanilla extract
150g raspberries
150g blueberries
2 small peaches, peeled & sliced
Icing sugar to dust
Lemon Mascarpone Cream
200g mascapone
150ml thickened cream
Juice & rind of 1 small lemon

Preheat oven to 180c. Grease a 24cm springform pan & line the base with baking paper.

For lemon mascarpone cream, beat ingredients in a bowl to combine. Cover & refrigerate until ready to serve.

Place butter & caster sugar in the bowl of an electric mixer & beat until light & fluffy. Whisk in the eggs one at a time, beating well after each addition. Whisk in sour cream. Process almonds in a food processor until fine crumbs, then fold into the mixture with the flour & baking powder. Stir in the vanilla then pour in half the batter into the cake tin and sprinkle with half the fruit. Repeat layers of batter & fruit. Bake for 40-45 minutes (cover loosely with foil if it starts to brown), until a skewer comes out clean when inserted in center. Cool in pan for 15 minutes then place on a rack & dust with icing sugar. Serve with lemon mascarpone cream.
Sunday, January 07, 2007

Chocolate Waffles (pancakes!) with cherry compote & Vanilla Yoghurt


Growing up one of my favourite breakfasts was waffles, which my Nanny made whenever we went and stayed at her place, she just made good old traditional waffles & served them with ice cream & syrup. Now that she has left us I decided it was about time I learnt how to make them myself so I got the machine off my mum & today gave them a go using a fancy recipe of Bill Granger’s from Bill’s Sydney Food. Well I had a little problem in that my machine was in German & I had no instructions so I tried it on the middle setting & heated it up good & proper, then sprayed with oil so they wouldn’t stick & dolloped on the first lot of batter. Disaster! The machine was way too hot & the mixture immediately stuck & that was it. Being a bit tired by this stage I couldn’t be bothered cleaning the machine so made my waffles pancake style, very delicious & wicked to be having such a chocolate treat for brekky & even though they weren’t as pretty as waffles I don’t think the taste was any the worse for the use of the frypan. Will get the waffle maker out again soon & try it a bit differently, if anyone has any tips on the cooking please help me! Thanks. Also I used fresh cherries as they are so delicious now, much better then frozen if you ask me.

Chocolate Waffles (pancakes!) with cherry compote & Vanilla Yoghurt

3 eggs, separated
1 ½ cups milk
1 teaspoon vanilla essence
60g unsalted butter, melted
100g good quality dark chocolate, chopped
1 ½ cups plain flour
2 teaspoons baking powder
a pinch of salt
Good quality dark chocolate, shaved (to serve)

Place egg yolks, milk, vanilla & melted butter in a bowl & stir until combined.

Place chocolate in a heatproof bowl resting over a saucepan of boiling water & heat until chocolate has melted. Allow to cool slightly.

Sift flour, baking powder & salt into a bowl & make a well in the centre. Gradually stir in the milk mixture until the batter is smooth.

Place the egg whites in a clean dry bowl & beat until soft peaks form. Fold into the batter with a large metal spoon. Add the melted chocolate & swirl through batter.

Cook according to the waffle iron manufacturers directions!

Serve with cherry compote, vanilla yoghurt & shaved chocolate.

Cherry Compote
½ cup caster sugar
250g frozen cherries
¼ teaspoon ground cinnamon

Place sugar in a small saucepan with ½ cup water over medium heat. Stir to dissolve then boil until liquid is reduced by half. Add cherries and cinnamon & cook for 2 minutes. Remove from heat & cool before spooning over waffles.

Vanilla yoghurt

1 cup natural yoghurt
1 teaspoon vanilla extract

Place ingredients in a small bowl & stir until combined. Refrigerate until required.

Wednesday, December 27, 2006

Raspberry Frangipane Tarts


Raspberries again, today in Frangipane tart form, recipe courtesy of Matthew Moran as featured in an old Delicious edition. The tarts were absolutely scrumptious & apart from the number of steps you need to take, all in all very simple. I have only one complaint with the recipe, it is supposed to make 8 & there was at least half of the pastry left over which is not too much of a problem as I froze it, but then there was also heaps of filling left over too which if I had of known I would have prepared extra shells to start with, as it was I was a bit stuffed by the time I got to that stage & threw the rest out, what a waste! Also take car not to overfill as I did as it all came spilling over the edges & Michael now has a nice mess in the oven to clean out for as in my current state I am not allowed to do much, I am lucky I am still allowed to cook occasionally!

Raspberry Frangipane Tarts

150g Raspberries
Icing sugar, to dust

Shortcrust pastry
90g icing sugar, sifted
2 cups (300g) plain flour
185g chilled unsalted butter
1 extra large egg

Frangipane
180g icing sugar
180g unsalted butter
3 eggs
1 ½ cups (180g) almond meal
1 ½ tablespoons dark rum

Sift the icing sugar onto a cool work surface (or large bowl as I used) & add the plain flour. Chop the chilled butter, then use your fingertips to rub the butter into the flour & icing sugar until mixture resembles breadcrumbs.

Make a deep well in the centre of the dry mixture and add the egg. Gradually bring the dry ingredients into the centre, then combine with your hands to form a smooth ball. (Alternatively, process ingredients in a food processor until well combined). Enclose in plastic wrap & chill for 20 minutes, then divide pastry into 8 portions.

Roll out 1 pastry portion to 2.5mm thick on a lightly floured surface. Lightly flour the rolling pin. Drape over the tart case & press into base & sides, the cut off excess. Repeat with remaining pastry & pans. Chill for 30 minutes.

For the frangipane, cream the butter & sugar until pale & thick (don’t over do or it will rise & collapse in the oven). Add the eggs one at a time, mixing continuously and adding some almond meal between additions. Slowly add the rum to the mixture until all ingredients are combined.

Preheat oven to 180c. Divide the frangipane mixture among the tart cases & smooth top. Press 6 raspberries gently into each tart & bake for 30-35 minutes or until lightly browned & cooked through. Cool in pans for 5-6 minutes, serve warm dusted with icing sugar with left over raspberries & vanilla ice cream

Monday, December 25, 2006

Butter Cut Out Cookies - Christmas Treats Part 3


Lastly for the Christmas boxes were some iced butter cut out cookies, recipe from Nigella Lawson in both How to be a Domestic Goddess & Feast. To save time I made the dough for these a few days ago & stuck it in the freezer, very good idea because by the end of the gingerbread men & the 60 or so of these I had to cook and ice I was exhausted, nothing was too difficult, it was just a lot to get through. I think they look really cute in my rustic hand made way & make a nice addition to the gift boxes, the tasted nice too. Can’t wait to see if everyone likes their goodies…

Butter Cut Out Biscuits

175g soft unsalted butter
200g caster sugar
2 large eggs
1 teaspoon vanilla extract
400g plain flour, pref Italian 00, plus more if needed
1 teaspoon baking powder
1 teaspoon salt
300g icing sugar, sieved, and food coloring

Biscuit cutters

Preheat oven to 180c. Cream the butter & sugar together until pale & moving towards mousiness, then beat in the eggs and vanilla. In another bowl, combine the flour, baking powder & salt. Add the dry ingredients to the butter and eggs, and mix gently but surely. If you think the finished mixture is too sticky to be rolled out, add more flour but do so sparingly as too much will make the dough tough. Halve the dough, form into fat discs, wrap each half in plastic wrap & rest in the fridge for at least an hour. Sprinkle a suitable surface with flour, place a disc of dough on it (not taking out the other half until finished with the first) and sprinkle a little more flour on top of that. Then roll it out to about ½ cm thickness. Cut into shapes, dipping the cutter into flour as you go, and place the biscuits a little apart on baking trays lined with baking paper.

Bake for 8-2 minutes, by which time they will be lightly golden around the edges. Cool on a rack and continue with the rest of the dough. When they’re all fully cooled, you can get on with the icing. Put a couple of tablespoon of just not boiling water into a large bowl, add the icing sugar & mix together, adding more water as needed to form a thick paste. Color as desired. Makes 50-60.

Sunday, November 26, 2006

The Age Harvest Picnic at Werribee Park

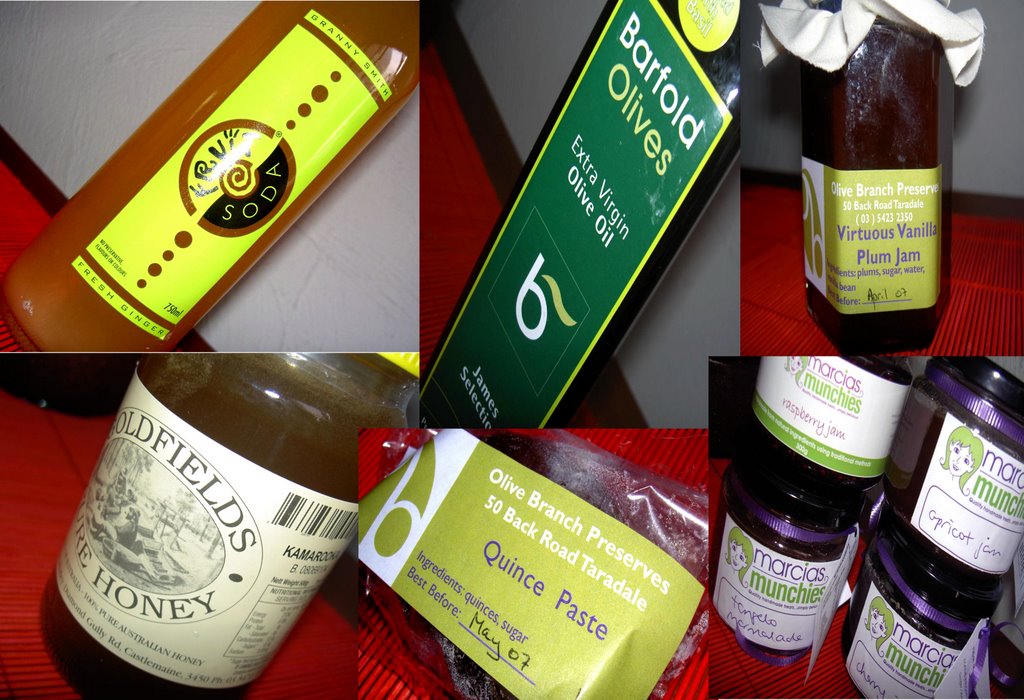
On this gorgeous Melbourne day I headed out to the Age Harvest Picnic at Werribee Park with Michael & my parents. We got there at about 10 so we got a good park & a good spot to set up on the lawn. It’s a beautiful setting & there were heaps of stalls filled with goodies. You can see in my photo how packed it ended up being by about lunch time. Some of the treats I bought to take home were Basil infused olive oil from Barfold Olives, some very refreshing Ginger & green Apple Fruit Soda cordial – made to an ancient tradition with fresh fruit, no preservatives, colours or artificial flavourings, Goldfields ‘Kamarooka’ honey, lot’s of jams from Marcia’s Munchies, hand made with natural ingredients – they were all so good I couldn’t decide so bough them all cherry, raspberry, tangelo marmalade & apricot, Some quince paste & stunning Virtuous Vanilla plum jam from Olive Branch preserves – though I don’t know what was virtuous about it – I thought it was wicked! I also tried lots of great bickies & sweets which I didn’t buy any of as at the moment I’m too busy making my own all the time. I had a small tub of chicken & seafood Paella from The Paella Pan - who do paella party catering – sounds interesting & the dish was yummy, some fantastic ginger ice cream from Irrewarra Natural Ice cream & tried some of Micahel’s Red Duck beer – very refreshing also. I love these events & today was the perfect day fro it, even managed to escape with minimal sun burn.

Saturday, November 25, 2006

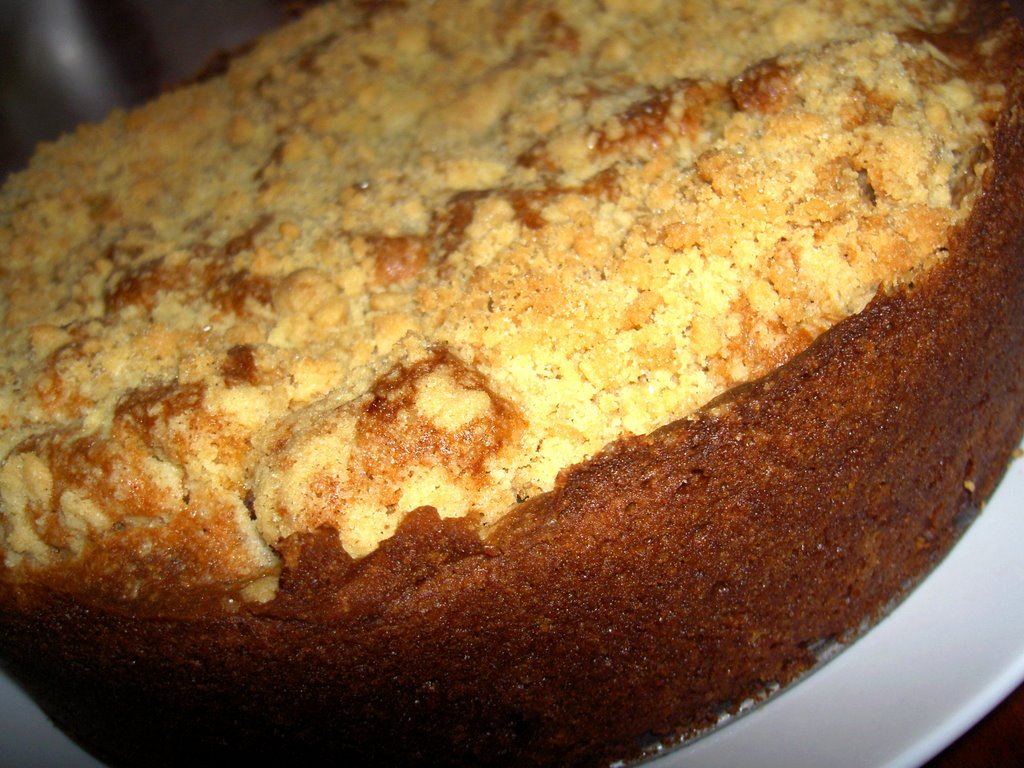
Strawberry sour cream streusel cake


Today after brunch at my place, Megan & I headed over to visit Rach & her new baby Ethan, so of course it was a good excuse for me to bake & take something along. I tried out this recipe from a recent edition of Delicious, it was scrumptious if I do say so myself & everyone loved it. The strawberry puree inside the cake was intense but not overly sweet & went perfectly with the crumble, who doesn’t love a good crumble? Definitely a winner to be made again

Strawberry sour cream streusel cake

¾ cup (165g) caster sugar
320g plain flour
1 tsp baking powder
½ tsp bicarb soda
240g chilled unsalted butter, cut into 1.5cm cubes
1 cup (240g) sour cream
1 large egg
2 tsp vanilla extract
2tsp Demerara sugar

Strawberry Puree
2 tsp cornflour
2 tsp vanilla extract
225g strawberries, hulled
3 tbs strawberry jam

For puree, make a paste of cornflour and vanilla, add to blender with berries and jam. Puree until smooth, set aside.

Preheat oven to 170c. Grease a 23cm springform pan.

Combine caster sugar, flour, baking powder and bicarb of soda in a large bowl. Rub in butter with your fingertips until mix resembles coarse breadcrumbs. Remove ½ cup and set aside, then add sour cream, egg & vanilla to the main bowl. Mix well with a wooden spoon.

Using a little over half the batter, drop dollops in to pan. Pat batter across bottom of pan & about 2.5cm up sides, mix will be very sticky and somewhat uneven. Add puree, making an even layer across bottom of pan & leaving a rim of dough above it. Cover with remaining cake mixture.

Use a fork to combine reserved flour and butter mix with Demerara sugar. Sprinkle evenly over cake, then bake for 45 minutes or until lightly golden. Cool in pan, then serve.